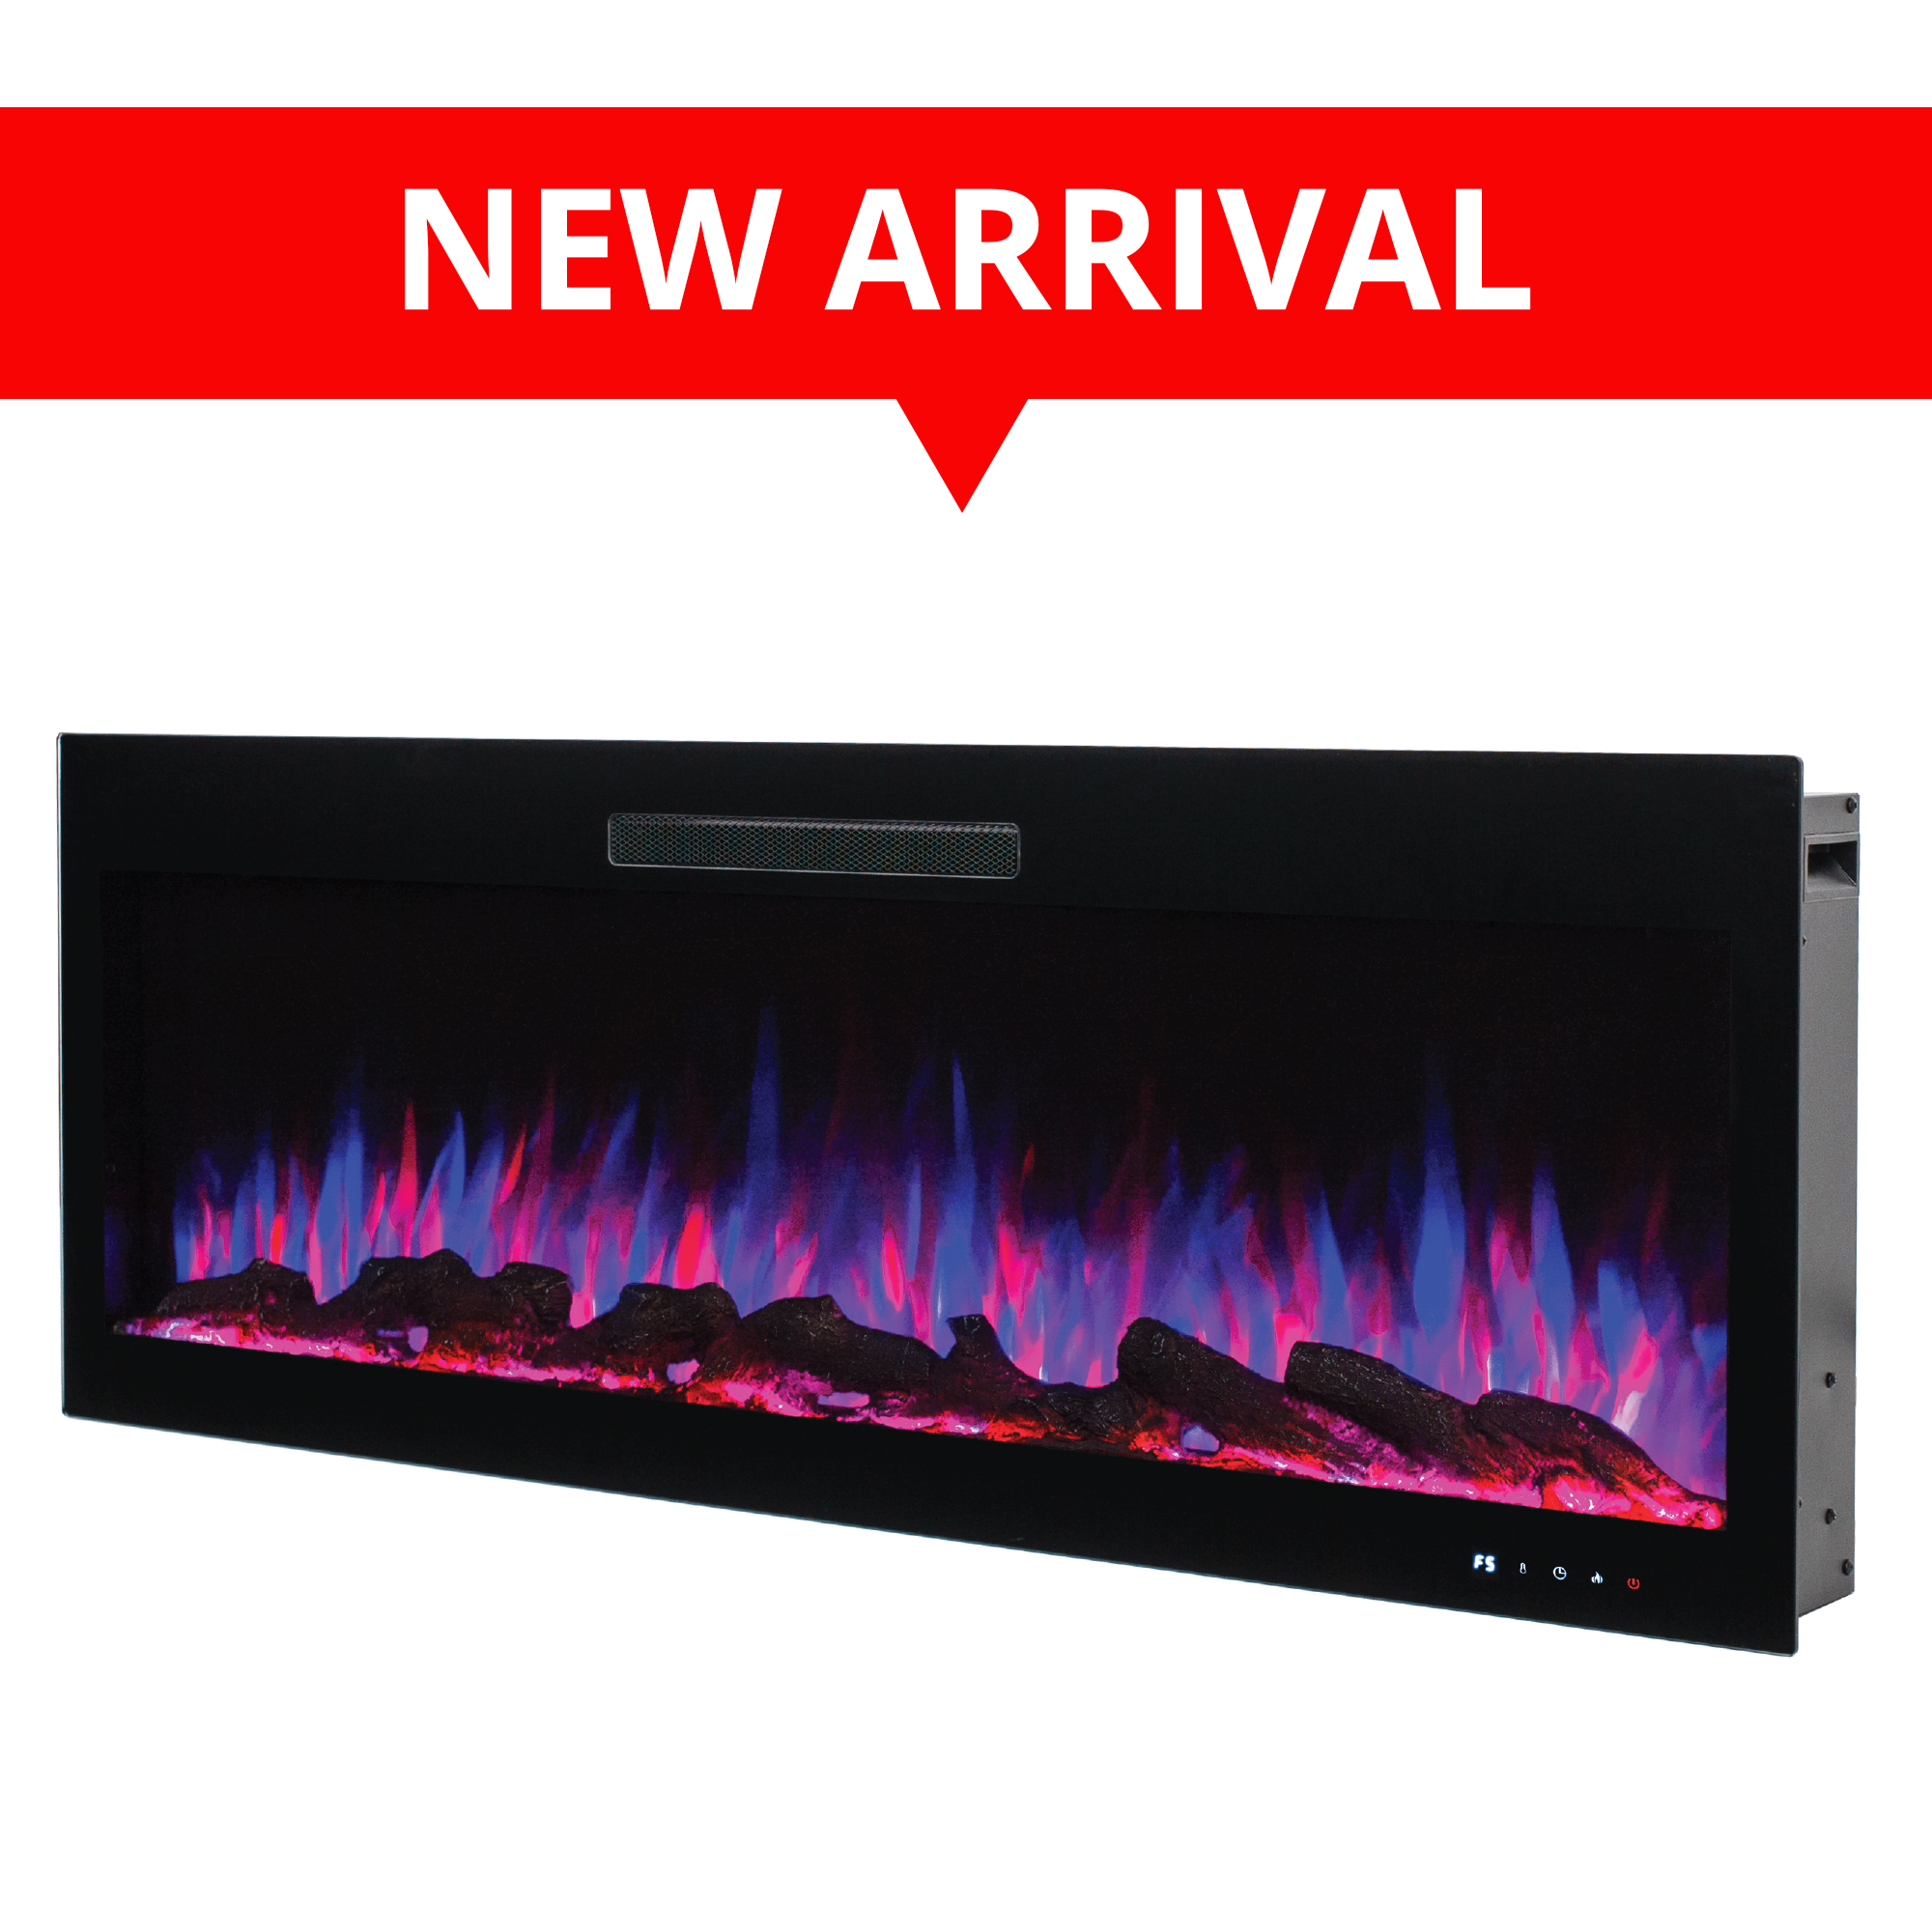
72 inch Wall Mounted and Wall Recessed Electric Fireplace

| Wattage | LOW - 750W and HIGH - 1465W (2 levels of heating) |
| Voltage | 120V AC, 60Hz |
| Timer Setting | 0.5-8 hours |
| Heat Area | Upto 400 sq.ft. |
| Glass Panel Colour | Black |
| Heat Location | Front |
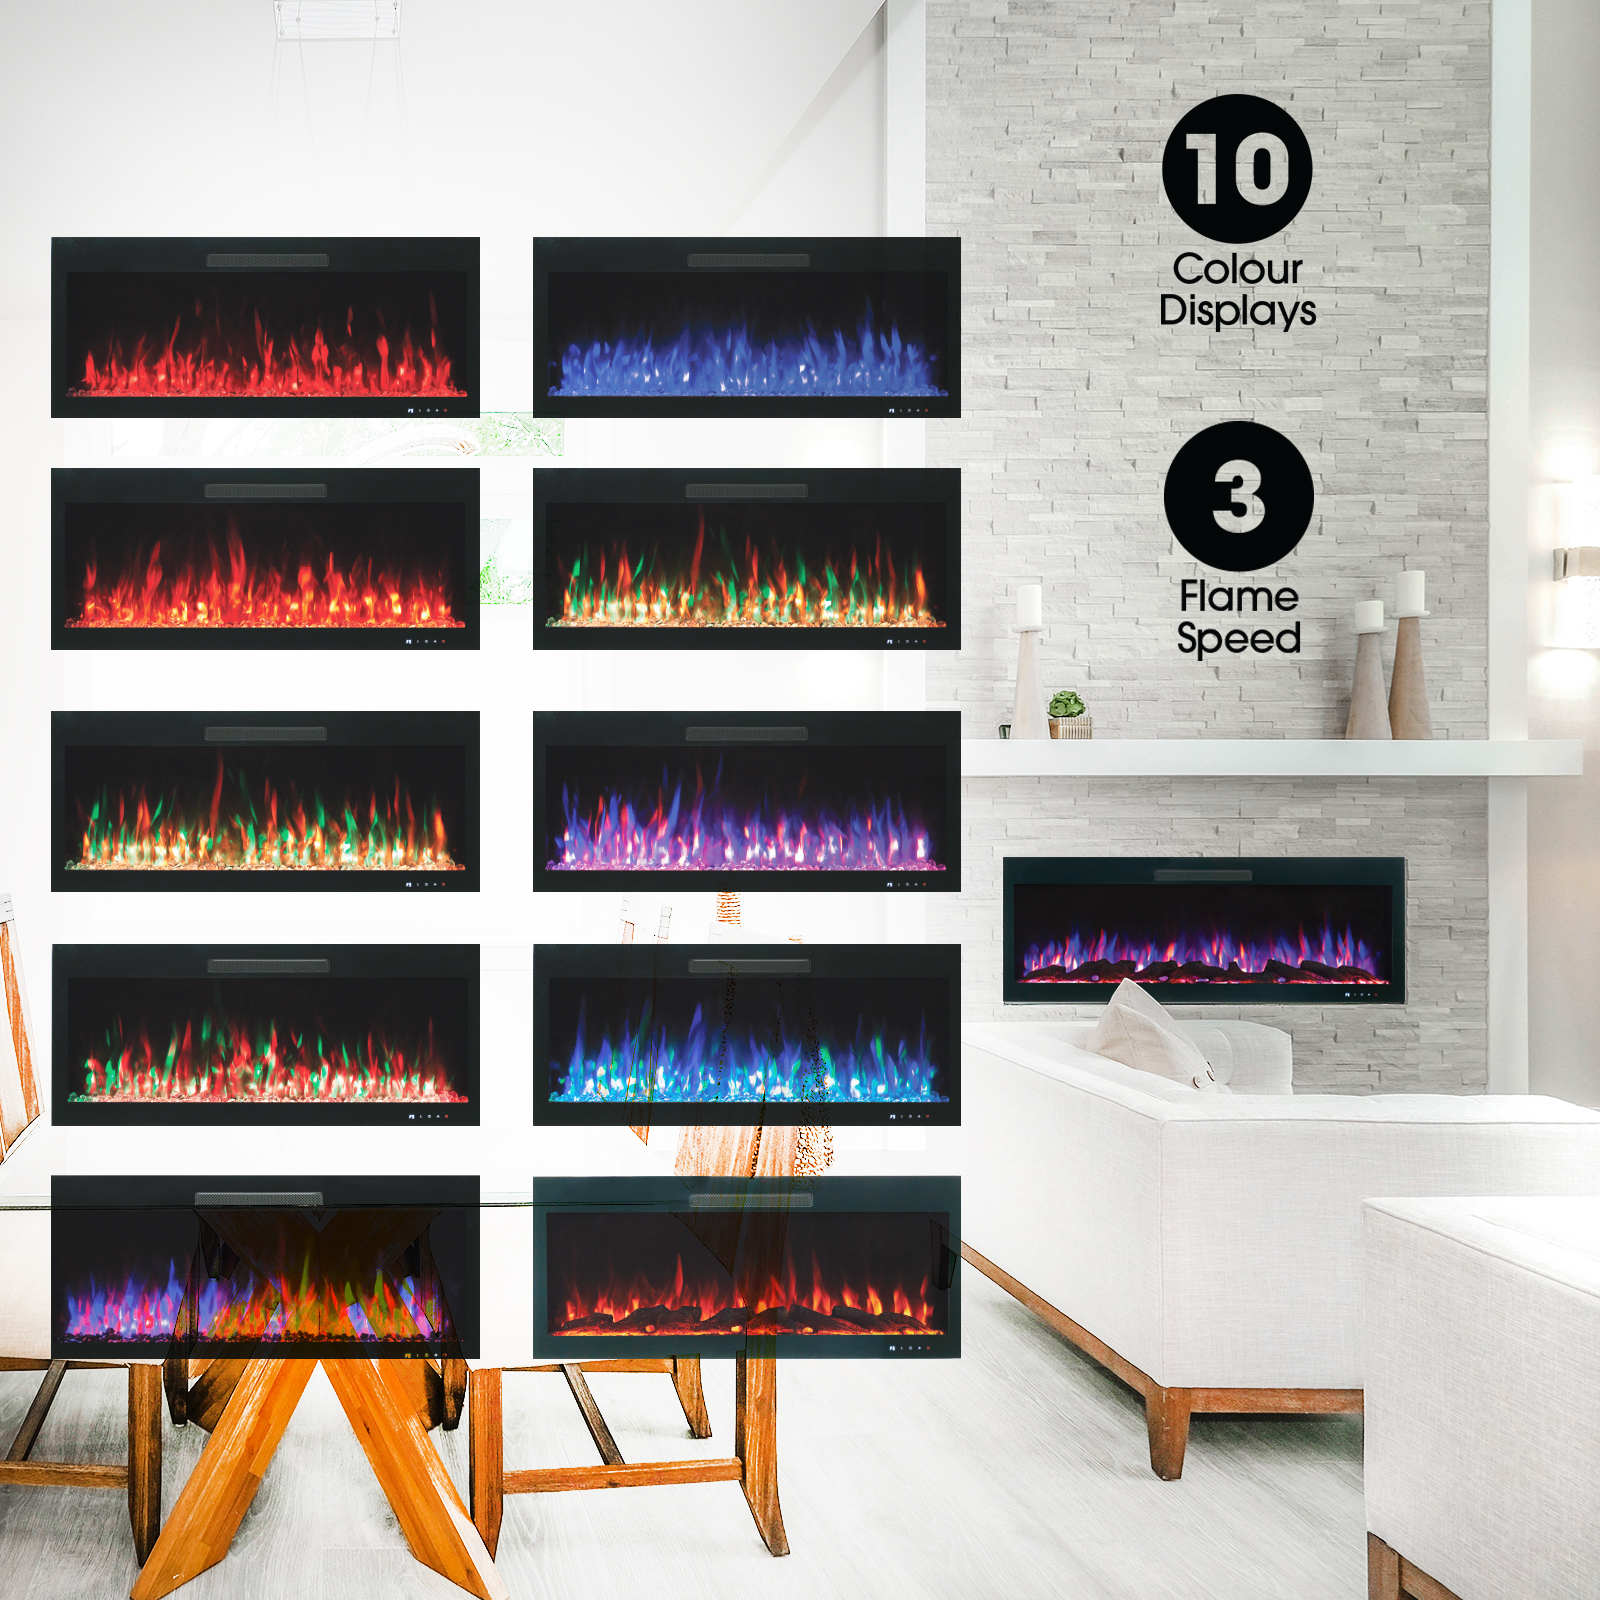
| Flame Colours | 10 colour options |
| Flame Speed Setting | 3 levels |
| Media Decoration | Crystals (clear and black), Realistic log-set |
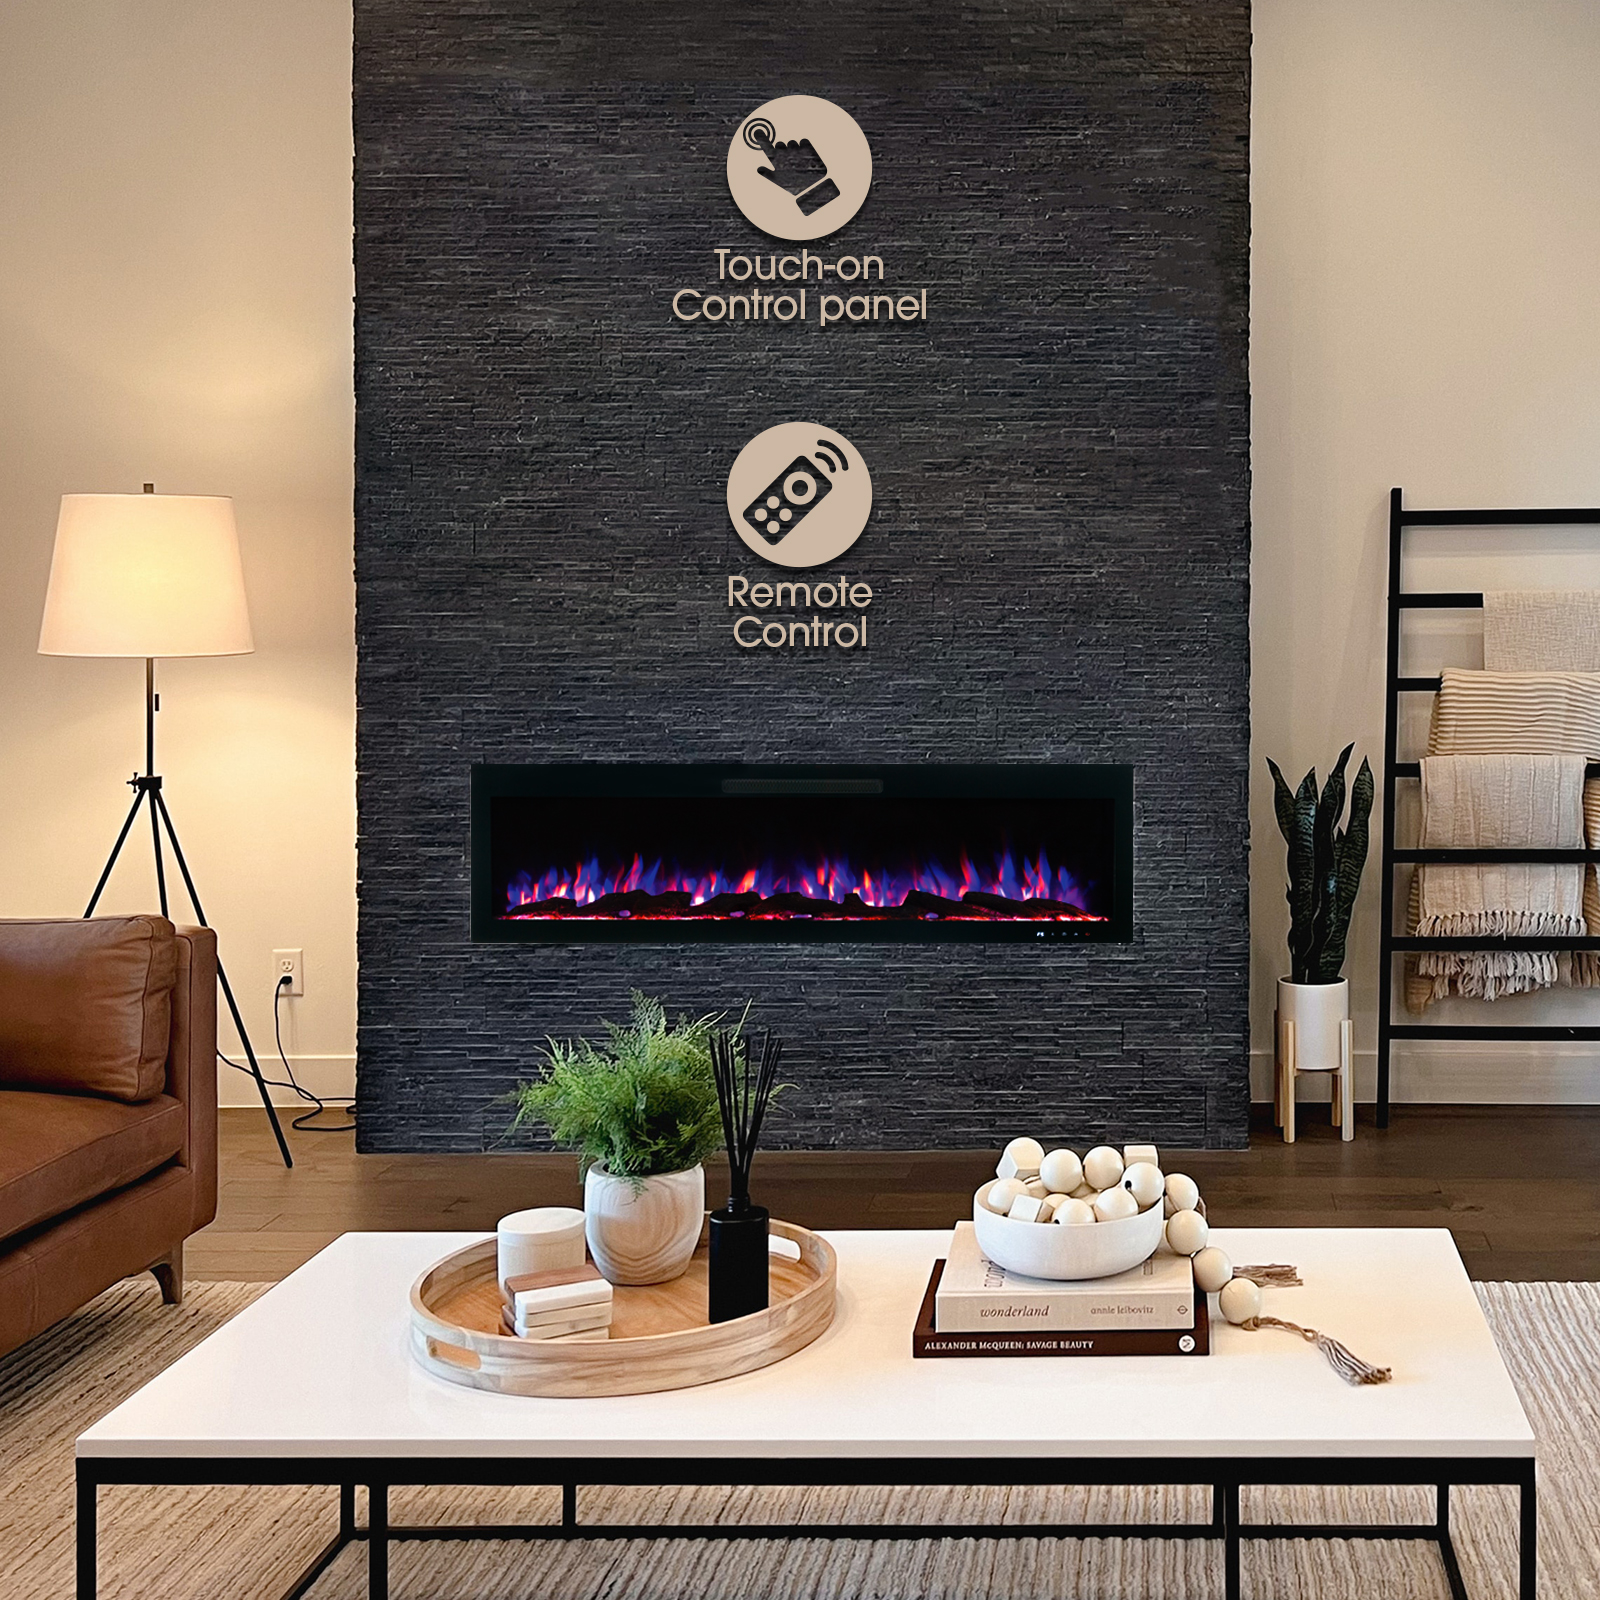
| Touch Panel Control | Yes |
| Remote Control | Yes |
| Flame Brightness | 5 levels |
| Wall Bracket | Yes |
| Warranty | 1 Year |
Recessed to Wall Installation
Wall Mounted Installation