OE-216-72W

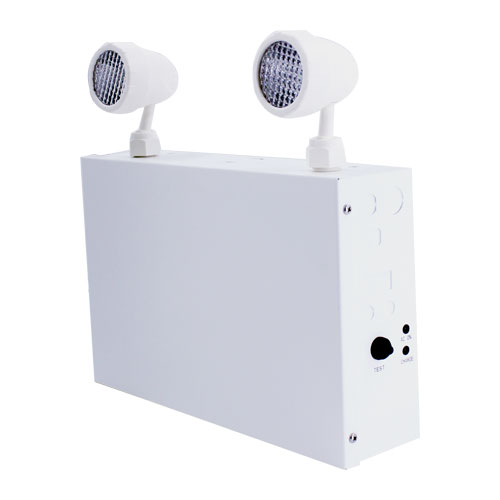
72W Max. LED dual head emergency light for up to 2 hours of emergency duration time


Description:
  • Full recharge time is maximum 24 hours
  • Suitable for +10ºC to +40ºC indoor damp locations
  • 2 pieces 2W ultra bright LED lamp heads for emergency mode 
  • 12V 7Ah Lead-Acid battery for up to 2 hours of emergency duration time
Wattage 72W Max.
AC Voltage 120V AC or 277V AC or 347V AC /60Hz
AC Charging Current 160mA AC Max.
DC Charging Voltage 10.5-14.8V DC
DC Charging Current 630mA DC
Lumens 260 lmn
Material Steel housing
Lightweight thermal plastic heads in matching colour
Battery 12V 7Ah
Battery Type Lead-Acid Battery
Emergency Duration Time 150W at 30mins battery backup time
65W at 90mins battery backup time
45W at 120mins battery backup time
Discharge Current 0.3-6.3A
Charging Time 24 hours
Colour Temperature 6500K (Cool White)
Operating Temperature +10°C ~ +40°C
Warranty 5 years

Hardwire Installation

  1. Extend non-switched 20 hour AC supply of rated voltage to a junction box (supplied by others) installed in accordance with all applicable codes and standards.
    Leave a minimum of 8 inches of slack on the wire.
    This circuit should NOT be energized / live at this time
  2. Open the unit by unscrewing the cover screws on the sides of the unit.
    The front cover can then be removed
  3. Unit is supplied with universal spider knockouts and keyhole slots stamped into the back of the cabinet.
    Knock out of the appropriate hole(s) and bring wires through the hole(s) into the cabinet
  4. Make proper wiring connections between the AC supply and the unit's transformer. Insulate unused wire. Connect ground to supplied ground wire in accordance with local codes. Reassemble all wire connections and connectors. FAILURE TO INSULATE UNUSED WIRE MAY RESULT IN A SHOCK HAZARD AS WELL AS UNSAFE CONDITION AS WELL AS EQUIPMENT FAILURE
  5. Batteries on larger units may be shipped separately to avoid damage in shipping. Install batteries into the cabinet and complete the appropriate battery connections
  6. Batteries already installed in the cabinet must be connected to the circuit board
  7. Secure all internal wires and replace cover and secure cover screws
  8. Turn on AC line voltage supply
  9. If the unit is supplied with a line cord, connect the line cord plug into the appropriate receptacle previously installed
  10. If unit is complete with lamp heads, position the lamp heads to provide best lighting distribution by loosening head set screws to adjust angle and swivel.
    Manually rotate or turn head(s) to the desired position, then tighten the set screws to lock position

Proud Partners