ST-1025

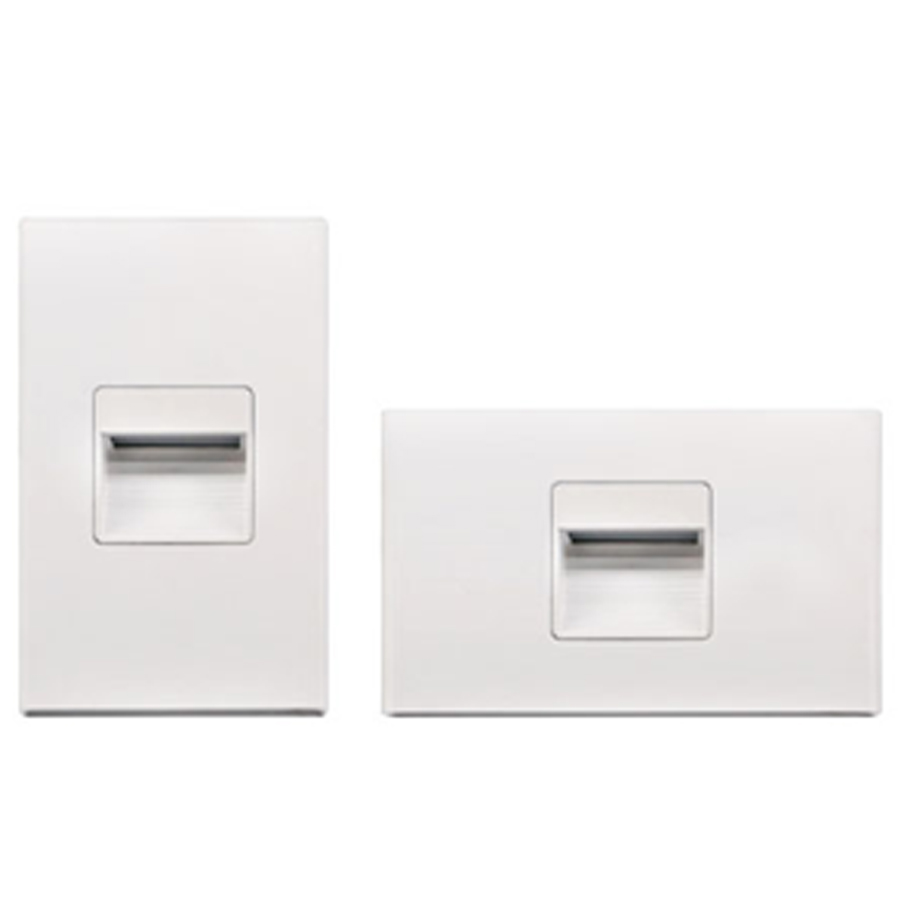
LED Step Light in 2.5W 120V AC for both vertical and horizontal mounting


Available Finishes:
  • White
  • Satin Nickel
  • Black

Description:
  • Suitable for wet locations
  • For both Indoor and outdoor applications
  • Type IC rated for direct contact with insulation
  • Both Vertical and Horizontal mounting possible


Wattage 2.5W
Voltage 120V AC
Lumens 125 lmn
Beam Angle 120°
Lifetime 35000 hours
CRI 80
Dimmable No
Rating IC Rated / Both Indoor and Outdoor use / for Wet location
Grade of Protection IP 67
Applications Indoor and Outdoor wall mount applications
Colour Temperature 3000K (Warm White) / 5000K (Cool White)
Operating Temperature -20°C ~ +40°C

Vertical Orientation

  1. Separate the Faceplate from rest of the assembly by loosening the Set Screw #4-40 (2 Set Screws for Hood) located on the short (bottom) edge of the Faceplate with the Allen wrench provided.
    Fixture is provided and ready to be installed in a vertical orientation 
    The ground wire is located on the bottom of the fixture
  2. Make electrical connections.
    Provide electrical service to the wiring box according to your local electrical code.
    Supply wire insulation must be rated for at least +75°C.
    Connect supply wires to fixture wires with proper size wire nuts (not included), so as to cover all bare current-carrying conductors.
    Connect black fixture wire to hot, white to neutral and green or bare fixture wire to ground.
    Place all wiring and connections back in wiring box.
    Make sure that supply wires are not pinched or otherwise damaged as the fixture is installed
  3. Mount the backplate assembly to J-box with the two 6-32 x 1" screws supplied
  4. Hook the Faceplate onto the Backplate Assembly by first sliding the Upper Catch located at the top of Faceplate, over the Upper Tab of Backplate Assembly.
    Press the Faceplate downward onto the Backplate until it is firmly seated on the upper tab
  5. For Hood Only — Firmly sit the Faceplate onto the Backplate.
    Push the Faceplate toward the wall ensuring that both Set Screws #4-40 clear top and bottom tabs. Skip step 6 if it is for hood only
  6. Push the lower portion of the Faceplate toward the wall ensuring that Set Screw clears the bottom tab
  7. Tighten the set screw #4-40 (2 Set Screws for Hood) with the Allen wrench provided


Horizontal Orientation

  1. Separate the Faceplate from rest of the assembly by loosening the Set Screw #4-40 (2 Set Screws for Hood) located on the short edge of the Faceplate with the Allen wrench provided
  2. Remove screws and separate backplate from Light Engine Assembly
  3. Turn backplate 90°
  4. Reinstall backplate to Light Engine Assembly with screws.
    The Ground Screw at the heatsink must still be at the bottom of the fixture
  5. Follow step 2 and 7 of "Vertical Orientation"

Proud Partners